Thursday, June 23, 2011

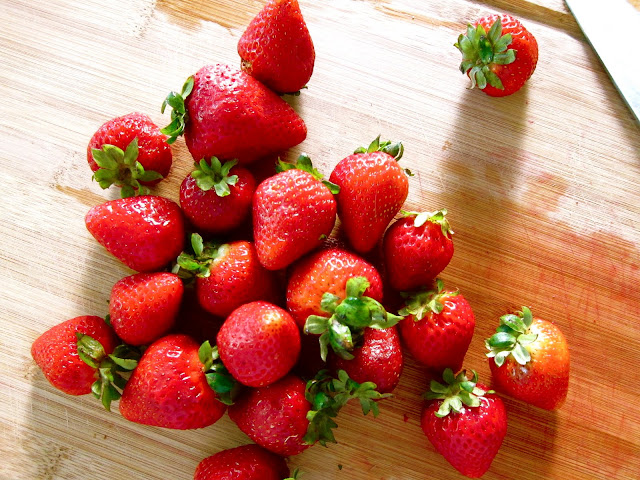
Strawberry Rhubarb Preserves


Spring is such a welcomed time of year!  Weather warms up, moods lift, and berries begin to appear!  The arrival of fresh, cool foods and summer dresses are just around the corner.  With summer coming soon, it is getting to be time to preserve some of that springtime goodness.  Jams and preserves keep the delicious spring fruits on our plates and in our memories long after the season has passed.  In my opinion, strawberries and rhubarb are some of the best things to have leftover from the springtime season. 

Last weekend, I went to a good friend's house for brunch. It was such a delight! We sat outside in the morning sun catching up on life then prepared a morning feast.  We dined on basil, parsley omelet with sharp cheddar as well as gluten free cinnamon raisin pecan bread, Greek yogurt, oranges, and this strawberry rhubarb preserve I had made that morning.  Let me tell you, this preserve complimented everything on our plates so well!  I would especially recommend combining it with yogurt.

A couple of weeks ago, I made rhubarb jam which was so delicious that it didn't last very long at all, so when I was planning this recipe, I decided to be slightly more ambitious and make more than just a half cup...especially since I would be sharing it with friends this time!  In retrospect, making jam in the oven is much simpler than on the stove top which requires constant monitoring, but let me assure you that the result of all the work to make this strawberry rhubarb preserve is fantastic!  


Some notes about this recipe:  Because this recipe does not use gelatin or pectin, this preserve is quite smooth like a fruit butter rather than a jelly or jam.  Also, I do not cover the canning process in this post so the shelf life will be shorter.  If you do wish for a longer shelf life, please reference other sites that provide methods for canning.   Finally, plan ahead!  Time your schedule so that the fruit can macerate for at least eight hours before you can cook it into preserves.


Strawberry Rhubarb Preserves

2 pints strawberries
1 lb rhubarb
zest & juice of 1 lemon
2/3 cup brown sugar, divided
1/2 tsp cinnamon


1. Hull and quarter strawberries.  Chop rhubarb into small chunks.


2. Toss strawberries, rhubarb, and 1/3 cup sugar in a large bowl.  Zest and juice lemon into the mixture. Stir well.  Now, let it sit on your counter (room temperature) for eight hours to allow the strawberries and rhubarb to macerate.  Cover the bowl with a kitchen towel to prevent things from landing in it.  If you're around, stir every once in a while.


3. Transfer fruit to a colander and drain juice into a large, wide bottom pot. Set the fruit aside. Heat the juice to simmering then add another 1/3 cup sugar.  Keep cooking at a lively boil and stir constantly until the sugar has dissolved and juice begins to thicken and look syrupy.


4. Add a little more than half of the fruit to the boiling syrup. Bring back to a boil and cook vigorously, stirring, until fruit is broken down and scraping a spoon across the bottom of the pan will leave a stripe of bare pan that fills in slowly.  Lower the heat if the preserves begin to scorch.

NOTE: Because there is less sugar in this recipe than the standard, it is important to be sure that the fruit mixture is quite thick before adding the rest...especially if desire pieces of fruit in the final product. 


5. Add cinnamon and the remaining fruit. Bring back to a boil and cook, stirring constantly, until fruit softens but does not disintegrate.  If you want it to be more constant texture through out, then cook for longer until the fruit softens to your liking. Taste and adjust sugar if necessary. Stop cooking when a spoon dragged across the bottom of the pot leaves a clean stripe and the suspended fruit has a texture that you like. 


6. Remove pot from heat.  Let preserves cool to room temperature prior to storage.  It you cannot resist sampling while it's cooling, this preserve is delicious to sample on toast, rice cakes, and yogurt!

Again, please note that I did not cover the canning process, so if you do wish for a long shelf life for this preserve, please reference other sites that provide methods for canning.


Monday, June 20, 2011

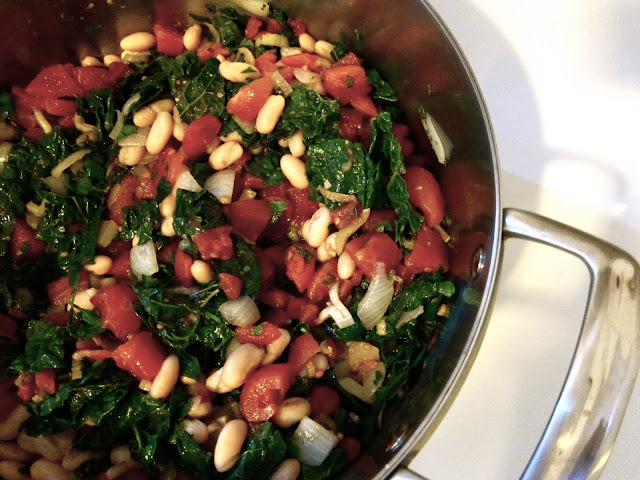
Kale and White Bean Soup


Last week, I was feeling a bit under the weather with that general feeling of "bleh."  It was one of those evenings when all I wanted to do is sit at home under the covers with a hot bowl of soup.  This brothy, vegetable-filled recipe really helps makes life feel good again.  The ingredients in this soup that make for a well rounded pick-me-up include:

  • Beans for some hearty protein and iron
  • Cayenne for increased blood circulation,  potassium and vitamins A, B6, E, and C 
  • Garlic historically used for antibacterial and antiviral purposes
  • Kale for anti-inflammatory, calcium, and carotene 
  • Tomatoes for antioxidants and vitamin C
  • Vinegar for fighting infections 
Plus the many spices and the heat, both spicy and temperature, makes it a delight as well as a healthful meal.  This soup hits the spot!

Kale and White Bean Soup
1 bunch kale, stems removed and leaves chopped
1 large onion, chopped
3 ribs celery, chopped
4 garlic cloves, finely minced
1/2 cup fresh parsley, chopped
1/2 cup fresh basil, chopped
2 teaspoon dried oregano
30 oz can diced tomatoes
15 oz can of cannellini
4 cups water
cayenne
juice of 1 lemon
1/4 cup red wine vinegar
salt and pepper to taste


1. Heat olive oil in a big pot over medium-low heat.  Sauté the onion and celery in the pot until the onion begins to brown and turn translucent.

2. While onion is cooking, prepare the kale by removing the center stem all the way up the leaf.  Cut the remaining, curly leaf into bite size pieces.  Rinse the chopped leaves to be sure all dirt is removed.

3. Once the onion has begun to brown, toss in the garlic and sauté about minute.  Add kale and let that cook in the pot while you add the parsley, basil, and oregano.


4. As the kale begins to wilt, add the canned tomatoes, cannellini, and water and allow the soup to simmer, adding extra water as needed, until the kale is tender.


5. Before serving, add cayenne, lemon juice, red wine vinegar, and salt & pepper.  Taste the soup and add more basil (or any other spice) to your liking.


Now curl up with your favorite tv show or a good book and enjoy your healthy road to recovery!  ...or just a light and tasty meal.  :-)

Friday, June 17, 2011

Fajita Bowl


Summertime foods like squash, corn, avocados, and tomatoes make for fresh and delicious Mexican-California-style recipes.  While growing up, taco night in my family's house consisted of a seasoning packet tossed into some ground beef or ground turkey fried in a pan.  Now that I am steering clear of both meat and prepackaged goods, this meal plan no longer really works. The following recipe is my first attempt at seasoning my first fajita bowl.  It was quite tasty, but still needs some tweaking.  Some variations I may try for next time is removing the cumin and adding some vinegar, perhaps of the red wine variety.  This time around, I served the veggie stir fry with the Refried Black Beans recipe and then topped it with various farmers market veggies and some aged blue cheese.  So good!


Spring Fajita Bowl
1 yellow squash
1 zucchini
1 onion
olive oil
garlic
5 mushrooms
1 carrot
1 small bell pepper
1 1/2 tsp cumin
2 1/2 tsp oregano
1 1/2 tsp chili powder
salt and pepper

Tasty Optional Toppings and Sides:
corn tortillas
rice
cilantro
cheese (I used blue cheese!)
lime
tomato
avocado
corn

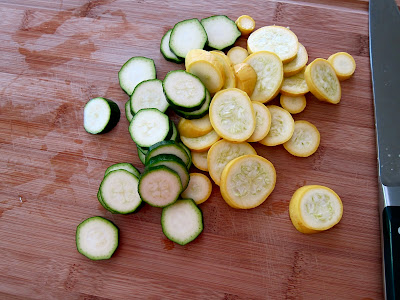
1. Slice the zucchini and summer squash.  Put the slices into a colander and lightly coat the slices in salt.  Set aside to let these veggies "weep."  (By pulling some of the water out of the squash beforehand, makes for a less soggy stir fry later!)


2. Chop the onion.  Heat a pan with olive oil.  Once the olive oil is hot, toss the chopped onion into the pan and listen to it sizzle!  Turn the heat to low and let the onions cook for about 10 minutes.


3. While the onions are cooking, dice the garlic and chop the mushrooms.  Once the onions begin to look translucent, add the cumin, chili powder, and oregano.  Incorporate the spices fully then add the garlic.  Cook for one minute, then add mushrooms.


4. While the mushrooms get a head start on cooking, cut up the bell pepper, remove the seeds, and chop into bite size pieces.  Slice the carrot.  When the mushrooms have started to turn darker brown and reduced some in size, add the carrots and bell peppers.  Stir veg to incorporate spices and other goodness.


5. It takes a while for the peppers and carrots to cook, so while they're doing their thing, this is a good time to slice avocado, cut lime into wedges and chop the tomato and cilantro (and prep any other topping you choose!).


6.  When the peppers and carrots look to be about five minutes from being done, rinse the salt off the squash and zucchini and toss them in to the pan with the rest of the cooking veg.


7. I like the fajita bowl veggies to be al dente, so after about five more minutes of cooking, remove the pan from the heat and add salt & pepper this dish to your liking.  Serve this dish with the tomato, avocado, lime, and cilantro you prepared.  This is also delicious with blue cheese, Refried Black Beans, corn tortillas, and/or rice.  Fix 'em how you like 'em and enjoy!

Wednesday, June 15, 2011

Refried Black Beans

This is a recipe that can be used as both an appetizer, a side dish to a meal, or a as a base in tacos.  It can be made right on the spot and served warm or it can be made in advance, chilled, and then serve alter with your favorite veggies or corn chips.  Because these beans are so versatile, I make this dish quite frequently!

Refried Black Beans (or Black Bean Dip):
1 Tbs olive oil
5 scallions, thinly sliced
1 tsp ground coriander
1 tsp ground cumin
2 cups black beans
1/2 cup water
1/4 cup chopped cilantro
cayenne to taste
juice of one lime
salt

1. Heat olive oil in pan.  Once hot, toss in scallions, coriander, and cumin.  Let sizzle for about five minutes.  Keep the heat relatively low so the bottom of the pan won't burn.

2. Add black beans and water. Stir. When the beans have started getting hot, begin to mash them with your spoon.  How much you mash the beans depends on your preference.  For dip, I mash them more than if I use them for filling in tacos.

3. When the water has cooked out and the beans have reached the desired consistency, remove the pot from the heat and stir in cilantro, cayenne, lime juice, and salt.  This dish can be served warm as part of a meal or chilled with your favorite veggies or corn chips.

Thursday, June 9, 2011

Ginger Peach Tea with Strawberries


Sometimes I think I think I'm a genius. I was missing some of the foods that contributed in creating my southern roots.  Sweet iced tea was at the top of the list! When I thought of this drink with combination of ginger, peach, and strawberries, I thought it would be great! But soon, I was put in my place again.  The ginger was slightly too overpowering for the strawberries so this glorious fruit did not end up contributing as much as I had liked.  Overall though, it was a lot of fun drinking this iced tea for the pure beauty of drinking iced tea with strawberries out of a mason jar.

Ginger Peach Tea with Strawberries

2 tea bags of ginger peach tea
Large mason jar
Honey
Ice cubes
2 strawberries, stems removed, sliced

At the risk of being slightly absurd, here is the recipe for the iced tea:

Boil Water.  While water is boiling, put the two tea bad in the mason jar.  Once the water has boiled, pour the water into the mason jar 2/3 of the way full.  Let steep for 5-10 minutes.  Stir in honey to your preferred sweetness.  Let the tea cool for as long as you can, this reduces the number of ice cubes you will need to use and thus prevent the tea from getting too diluted.  (putting the tea in the fridge speeds up the process)  Once you have waited as long as you can wait, remove the tea bags and fill the rest of the glass with ice.  Stir in strawberry slices and enjoy!

You can add some whiskey for an extra kick!

Tuesday, June 7, 2011

Rhubarb Jam


Mamma's little baby loves rhubarb, rhubarb,
Beebopareebop Rhubarb Pie.
Mamma's little baby loves rhubarb, rhubarb,
Beebopareebop Rhubarb Pie.

If any of you listen Prairie Home Companion, then you know exactly what I'm singing about!  I just kept humming this little melody while chopping the beautifully pink vegetable.  Admittedly though, I'm not making rhubarb pie, but jam is just as delicious!  And boy, for a rainy day, I can't think of a better way to warm up the kitchen than with a sweet, cinnamon smell of roasting rhubarb!
So, to lay it all out, I had never made jam before this moment.  But let me tell you it was so quick and easy that I'll probably start making jam much more!  It is just so delightful to spread warm jam on some morning oatmeal, crackers, or my personal fave: chocolate chip cookies!


Rhubarb Jam

1 pound rhubarb, tough ends removed & cut into large chunks
1/4 cup brown sugar
scant 1/2 teaspoon cinnamon

1. Preheat oven to 400ºF. Remove tough ends of the rhubarb and chop the stalks into chunks.


2. Toss rhubarb with brown sugar and cinnamon in a nonstick baking dish. Roast for 20 minutes until thick and bubbly. Keep an eye on it since this is a sugary dish thus it can burn easily.  (Even if it does burn, the jam is not ruined, just don't scape the burnt bits off the bottom.)


3. Remove the sweet rhubarb from the oven and scrape contents into a small mixing bowl.  Mix the pink goodness well, then let cool completely. Transfer to jar that can be sealed tightly. 


Since this recipe does not go through the process of sterilizing jars for sealing, this jam recipe can store in the frige for up to two weeks...if it lasts that long!

Monday, June 6, 2011

Flourless Chocolate Cake


An evening of celebration!  One of my close friends just graduated!  So of course it is important to take time to celebrate such an accomplishment.  The party was a 1920s themed so I started cruising the Internet for party recipes from that decade.  When I realized that my options were dishes like "Nuts and Date Salad Mayonnaise" or "Jellied Tomato and Pimiento Salad with Olives and Celery Hearts," I decided that perhaps a throw back dish would not be quite the hit I was looking for.  Also, as a side note, did you know that all of the following foods were introduced in the 1920s?
Eskimo Pies, Baby Ruth, Wonder Bread, Betty Crocker, Land O'Lakes, White Castle, Quaker Oats quick oats, Girl Scout Cookies, Gummi Bears, Mounds, Welch's grape jelly, Popsicles, Reese's Peanut Butter Cups, Yoo-Hoo, Caesar Salad, Wheaties, Graham Crackers, Mr. Goodbar, Safeway, Milk Duds, Gerber's baby food, Pez, Kool-Aid, Rice Krispies, Velveeta cheese, Peter Pan Peanut butter, Oscar Meyer wieners, Snickers, Twizzlers, 7-Up
Some pretty prominent foods and institutions came into being during the 20s!  But today, many of these packaged, prepared foods are not quite the delicacies they used to be, so I just decided to fall back on my personal favorite:  Chocolate!


I am so pleased that I got to do a party cake especially since it usually takes the excuse of a special occasion to make a cake rather than just choosing to eat one all by yourself!  This is the first time I made the following recipe.  It has been modified from various different sources and it turned out so well that I want to make this cake over and over again!  It has that moinst, dark-chocolate richness that melts in your mouth.  Plus, it is so simple that it does not take more than an hour of active cooking time.  Thus, twice as fabulous!


Flourless Chocolate Cake


5 ounces fine-quality bittersweet chocolate
1/2 cup unsalted butter
1/2 cup sugar
1 Tbs vanilla extract (esspresso is a great substitute for vanilla!)
4 large eggs
1/2 cup unsweetened cocoa powder
powder sugar and fresh fruit for decoration


1. Preheat oven to 375°F.   Butter a 9-inch round cake pan and line the bottom with a cut out round of parchment paper.

2. Bring water to a slight simmer in the bottom part of a double boiler.  While the water is heating up, chop up the butter and 5oz of your favorite dark chocolate into small pieces and put them in the top part of the double boiler.  Melt chocolate with butter, stirring, until soupy and smooth.  (No stress if you don't have a double boiler, I don't either, so I used a pot and then put the chocolate and butter in a smaller sauce pan with a long handle.)


3. Remove top of double boiler from heat and whisk sugar into chocolate mixture until the sugar is well incorporated.  Let the mixture stand for five minutes to cool.  (you don't want to cook the eggs in the next step!)


4. While the chocolate is cooling off, break four eggs into a medium mixing bowl and whisk well.  Add the sweet chocolaty goodness to the eggs and whip briskly until everything is incorporated.


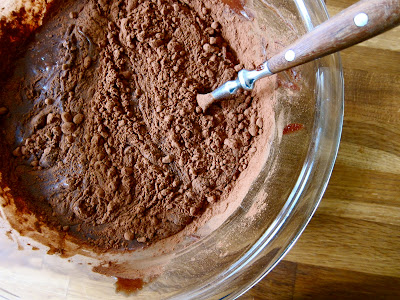
5. Sift 1/2 cup good quality cocoa powder over chocolate mixture and whisk until just combined.


6. Pour batter into pan and bake in middle of oven 22 minutes, or until top has formed a thin crust.  Test by poking a fork in the center; if the fork comes out clean, the cake is done!  Cool cake in the pan for about 5 minutes then invert it onto a serving plate and remove parchment paper.  (While it is cooling, this is a great opportunity to wash and prep the fruit you will decorate the cake with).


7. Let cake cool completely before you dust cake with powdered sugar.  Finally, top it with fruit. 


Voila!  You're done!  If by chance there is cake left after the party, it will keep for quite a while in the fridge or freezer.  So def keep it around for future leftovers snacking!


The cake at the party


Saturday, June 4, 2011

Shout out to GF Steel Cut Oats!


Multiple times a year during my childhood, my parents would pack up the car, stuff the kids in the back seat, and we would take a two hour drive to visit the grandparents who lived on top of a mountain in the southern foothills of the Appalachians.

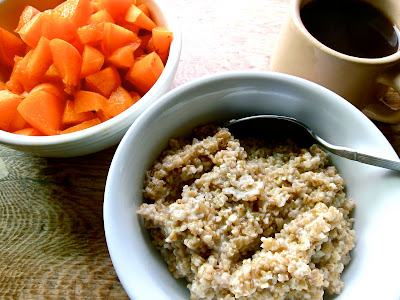
Many times for breakfast, my grandmother would prepare steel cut oats for breakfast and we would garnish it with fresh fruit, cream, and brown sugar...of course, when you are a kid you frequently attempt to see how much sugar you can put in your breakfast and get away with it.  At the grandparents' house it's pretty much all the time!  


apricots, oatmeal and coffee

When gluten was cut out of the diet, so were steel cut oats since all oats at the time were processed in the same facilities a wheat.  Within the past couple of years, it has changed!  So now, it is just so pleasing to me that I can have a big bowl of oatmeal without the worry!   I reminisce about breakfast at grandmas while eating a warm breakfast with fresh, seasonal fruit, and now with much less sugar.

Oysters and Quinoa Salad by the Bay


One can do so much eating over Memorial Day weekend! It is always exciting to pack a picnic and head to the bay side to crack into some fresh oysters while munching on fresh cherries and quinoa salad!   We prepared the quinoa salad ahead of time and stuck it in a cooler with some fresh cherries, and left overs from our cook-out the night before.  We headed up to Tomales Bay Oyster Co where they have scores of picnic tables each decked out with a bbq and an oyster shell recycling bin.

The scene there is always lively on a beautiful day and I love being surrounded by various people having a good time around fresh food and a smokey bbq.  For the picnic, we opted to eat our oysters raw.  When they have just been pulled out of the bay that day, it is not possible to get any fresher and the best opportunity to eat some good seafood!


Oysters Raw

You will need an oyster shucking knife and as many raw oysters as you think you can eat!  

Picking oysters: When choosing oysters, it is important to make sure they're fresh so there are two rules!
     1. they do not smell 
     2. they should not be open.  If it is open, it should quickly snap shut once tapped. 

If the oyster doesn't fit both of these criteria, don't buy it!

1. To shuck, hold the oyster firmly in one hand with a cloth towel so the shell does not hurt your hand.  If you can, find a bit of a gap in the oyster shells and slip the knife blade between the shells.  Ideally, the hinge of the two shells will be opposite of where your leverage is with the knife.

2. Using a twisting motion, pry the top and bottom shells apart.  Run the knife around the oyster continually doing this.  Try not to lose the delicious brine inside!  As you get more practice, you can also work on keeping little pieces of shell from getting into the meat too!  Remember, this is challenging so be forceful yet patient!  


3. Once you are in and have removed the top part of the shell, run the knife along the bottom of the oyster to detach the tough knob from the underside. 

4. Toss some hot sauce on the meat and down the hatch!

We ended up ordering too many oysters so we had the raw for lunch and then took the leftovers home to grill out that evening. 
Storing: Do not store the oysters in water. If you do not plan to eat them right away, arrange them flat on a tray, cover them with a damp towel, and store them in the refrigerator. They'll keep this way for about a day.  Or if you're on an out door adventure like we were, keep them in a cooler with a bag of ice on them until you can get to a refrigerator.


Grilling Oysters

Once you have a hot grill going, place your closed, raw oysters on hot grill.  Be sure to place them so the cup side on bottom to keep all the delicious juices in the oyster.  Cover barbecue with lid and cook until shells just begin to open to indicate doneness.


Spicy Quinoa, Cucumber and Tomato Salad

1 cup quinoa
3 cups water
Salt to taste
2 cups diced cucumber
1 small red onion, green onion, or shallot finely minced (optional)
2 cups finely diced tomatoes
1 to 2 jalapeño or serrano peppers (to taste), seeded if desired and finely chopped
1/2 cup chopped cilantro, plus several sprigs for garnish
2 tablespoons fresh lime juice
1 tablespoon red wine vinegar or sherry vinegar
3 tablespoons extra virgin olive oil
1 avocado, sliced, for garnish

1. Bring the 3 cups water to a boil in a medium saucepan. Rinse quinoa and add to boiling water along with a dash of salt. Simmer for about until most of the water has been cooked into the grain. Cover the pan and allow to sit while you are preparing the veggies.

2. While the quinoa is cooking, finely chop the jalapeño and onion.  Since they will be raw, you only want small bits of these in your mouth when eating the end product.  Chop cucumber, cilantro and tomato. 

3. Combine the tomatoes, cucumber, onion, chilies, cilantro, vinegar, lime juice and olive oil in a bowl.  Add quinoa then toss together, and taste and adjust seasonings to your liking. Serve garnished with sliced avocado and cilantro sprigs.

Inspiration for quinoa salad is from nytimes.